Edit the Due Date of a Task
Seb
Last Update 3 years ago
Due dates for homework tasks can be edited at any point before or after the task's original due date.
PLEASE NOTE: Due dates cannot be set before today's date.
PLEASE NOTE: When a due date is updated so is other relevant data. For example, if a student completes a task late, and you extend the due date past the date that the student completed the task, it will no longer be marked as late.
There are two ways of editing due dates:
- Editing the due date of a task for all students
- Editing the due date of a task for one student
To start, login to the homework manager.
Edit the Due Date of a Task for All Students
Navigate to the homework section of a class. You can do this by clicking the "Computing Lab" logo at the top of the screen, then selecting the class you want to view from the table.
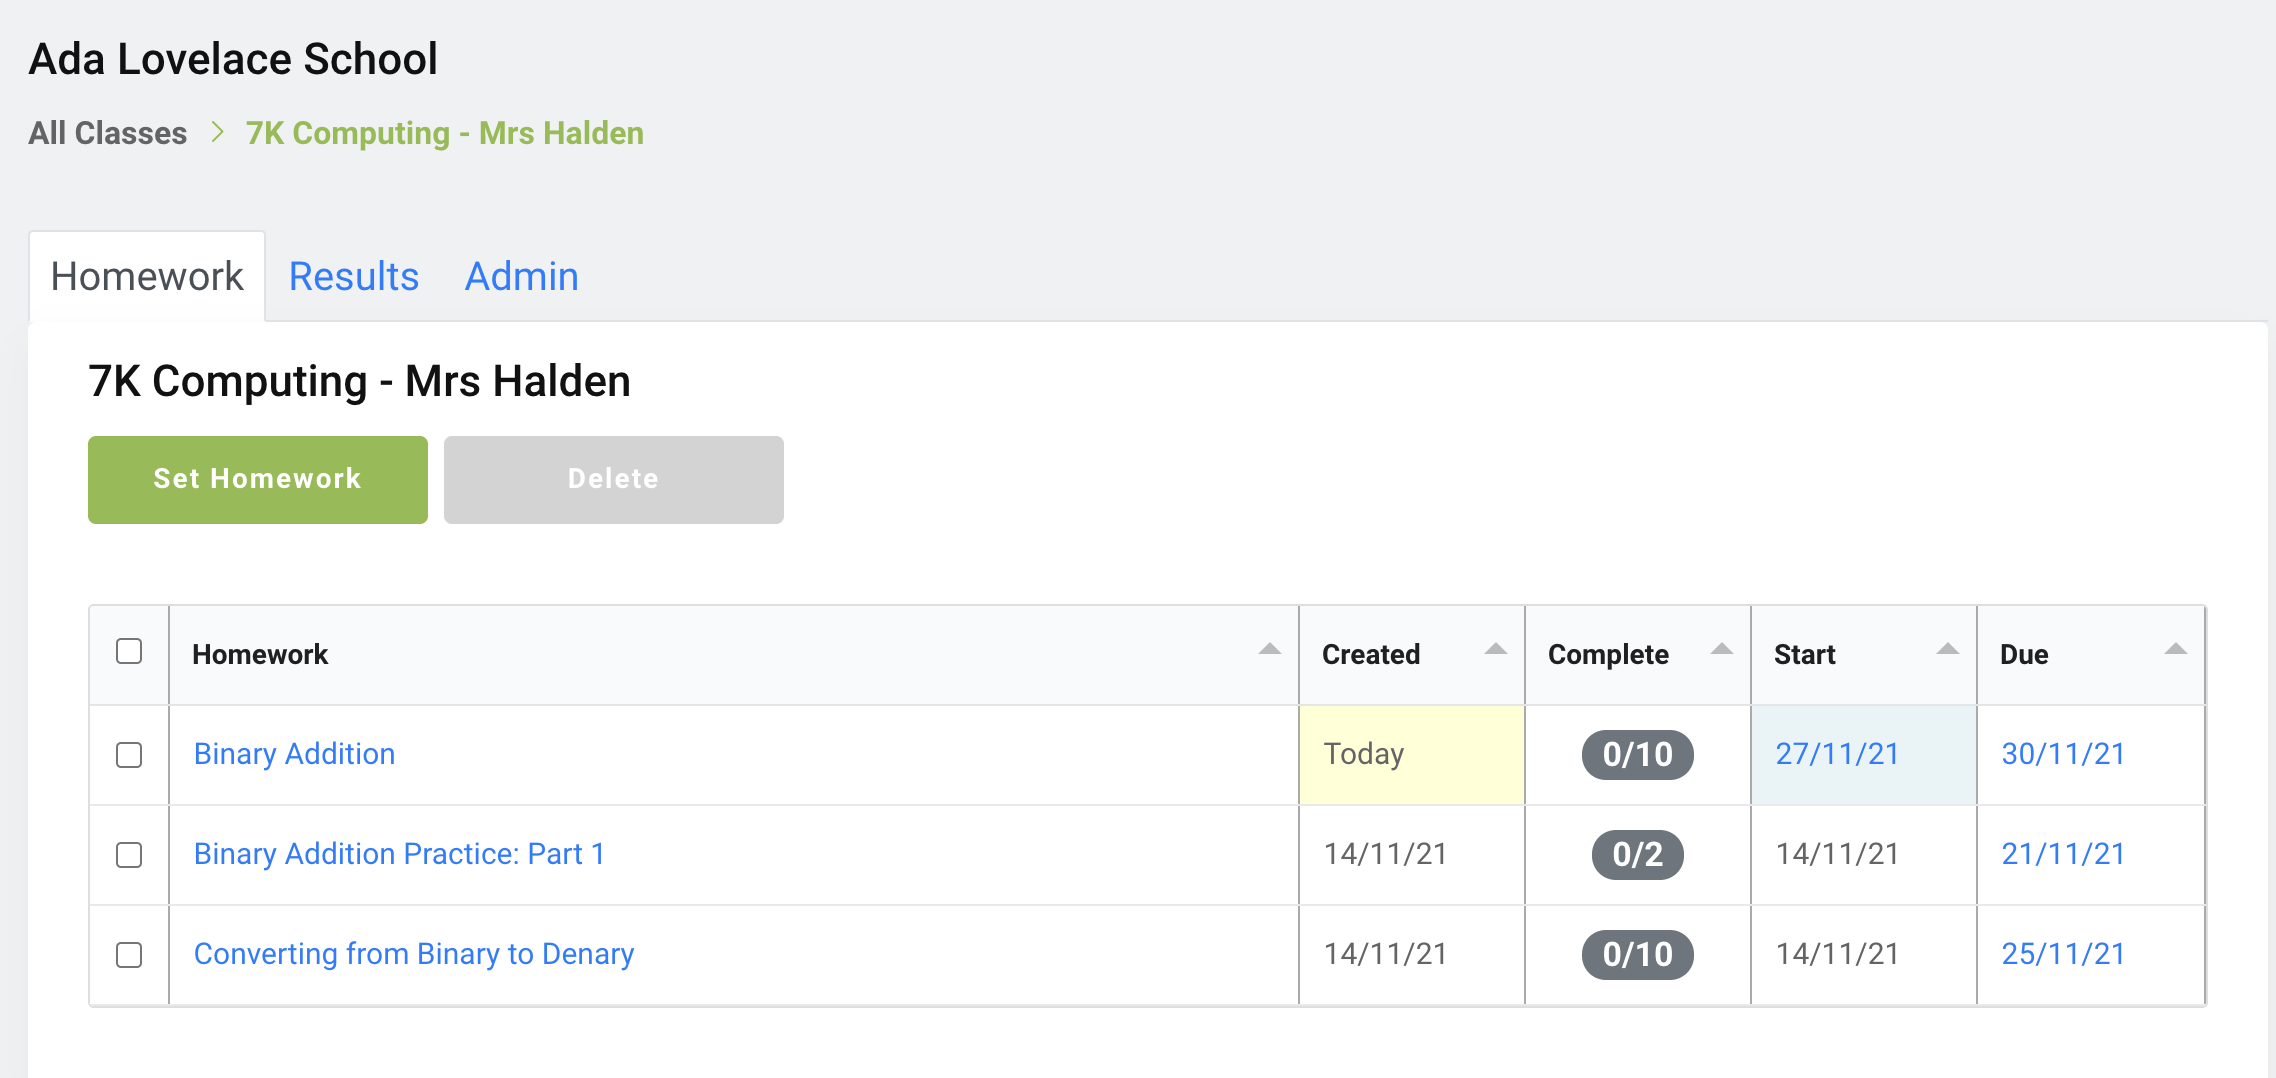
Find the task that you want to edit the due date for and click on the date in the "Due" column.
A view will appear on the screen.
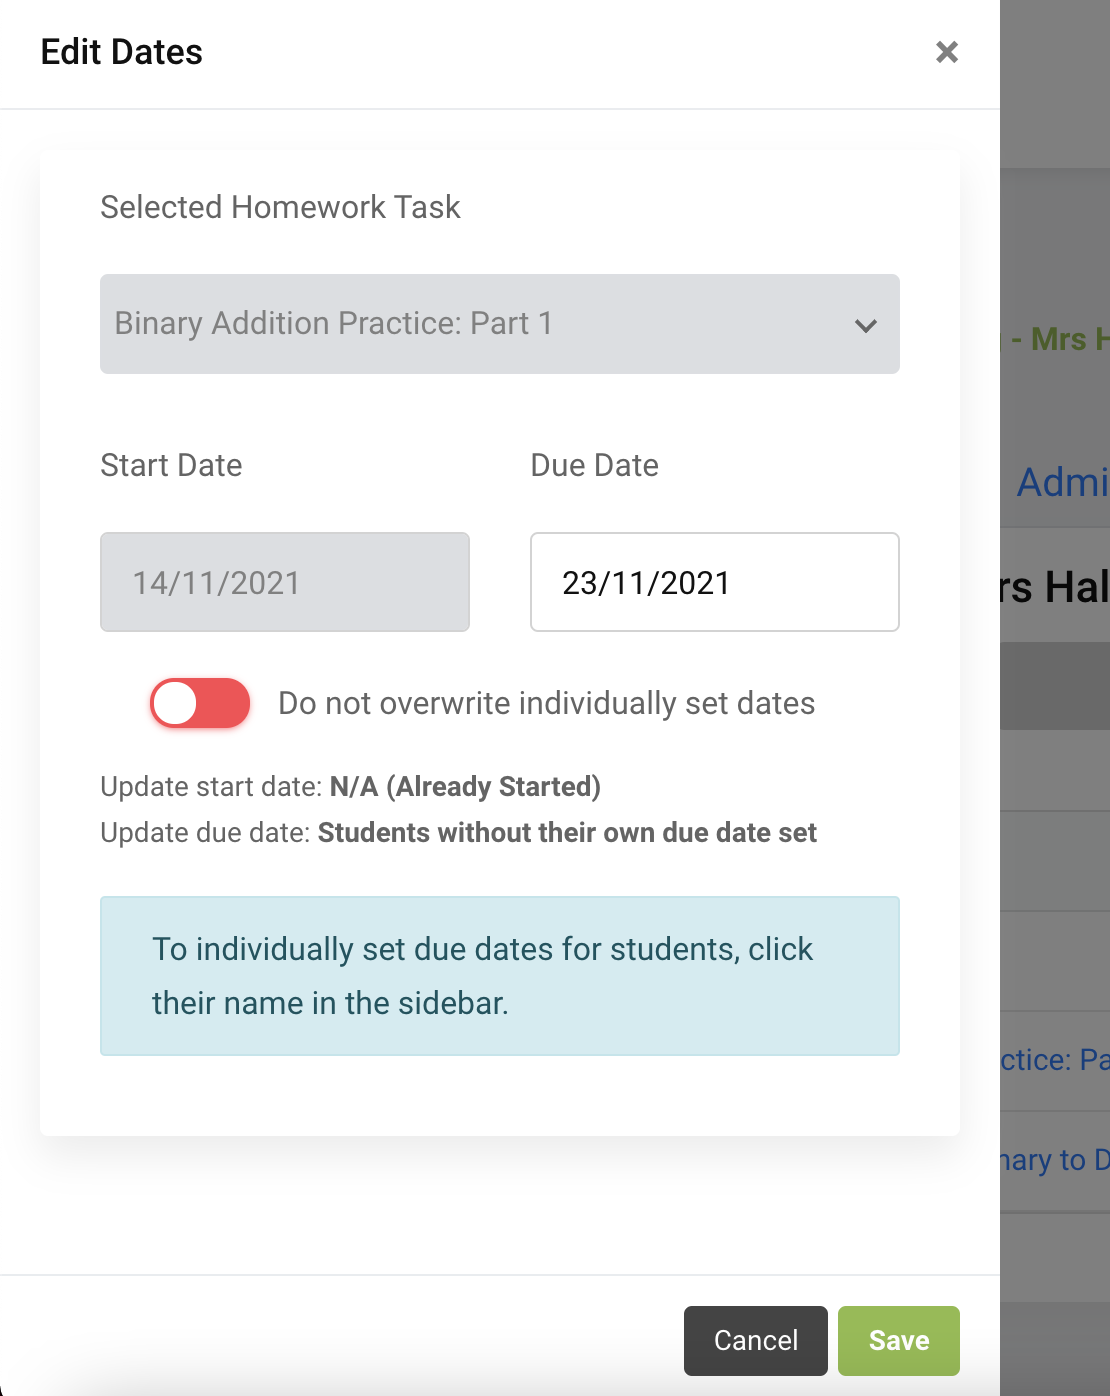
The homework task is displayed at the top, and so are the start and due dates.
As you can see, the start date is greyed out. This is because the start date is in the past, meaning the task is already visible to students. The due date can still be changed. To do this, click on the due date box and select a new due date in the future.
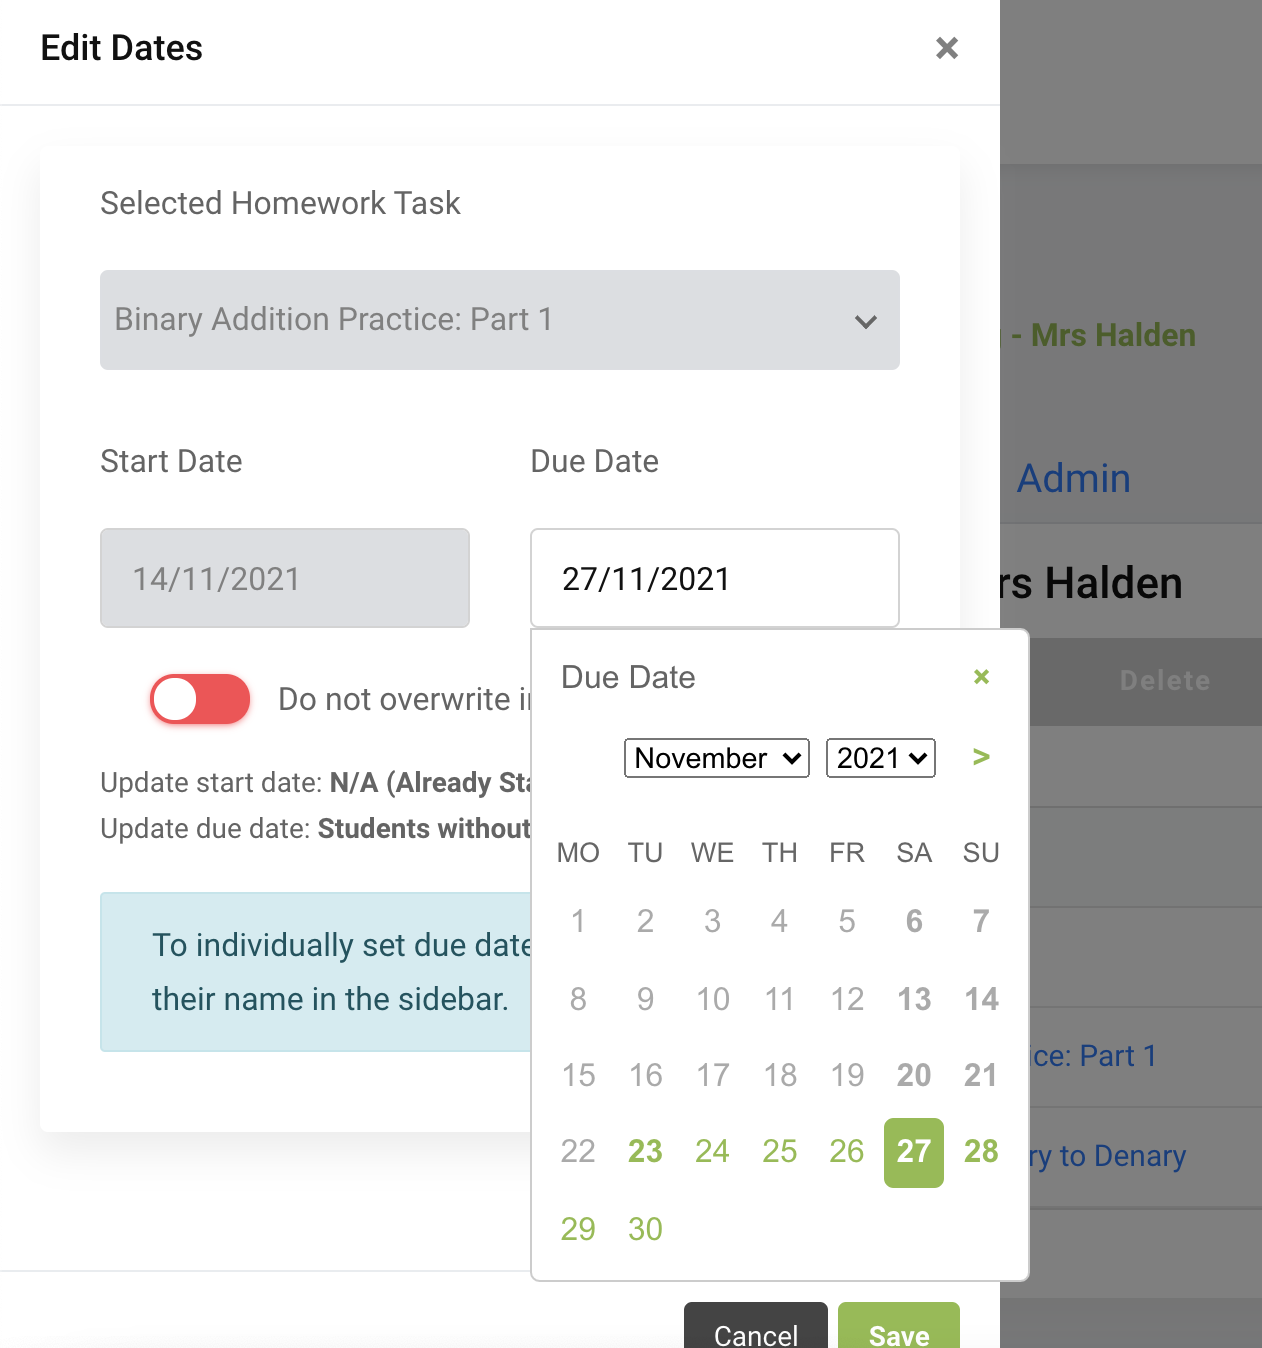
Click the "Save" button to apply the changes.
Edit the due date of a task for one student
Navigate to the homework section of a class. You can do this by clicking the "Computing Lab" logo at the top of the screen, then selecting the class you want to view from the table.
Click on a student from the sidebar.

Find the task that you want to edit the due date for and click on the date in the "Due" column.
A view will appear on the screen.
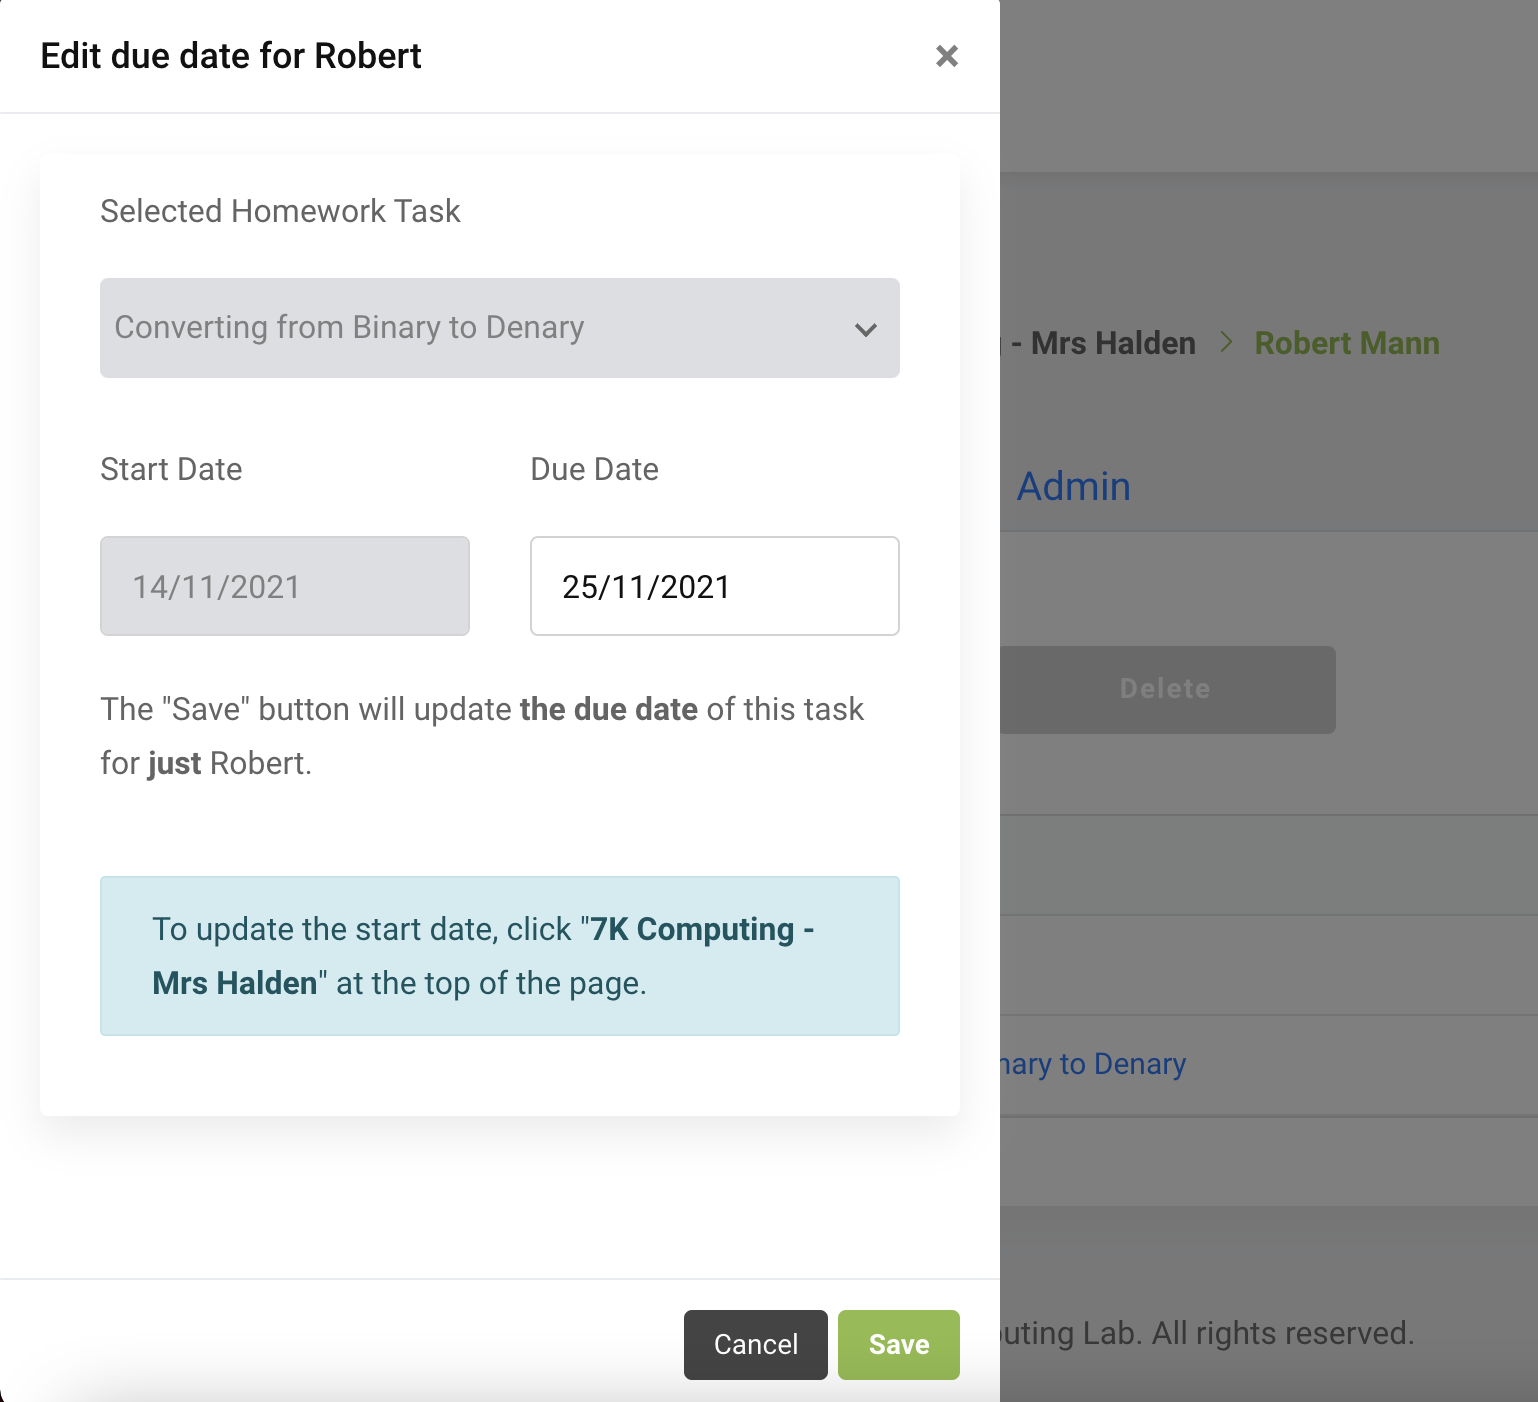
The homework task is displayed at the top, and so are the start and due dates.
As you can see, the start date is greyed out. This is because the start date is in the past, meaning the task is already visible to students. The due date can still be changed. To do this, click on the due date box and select a new due date in the future.
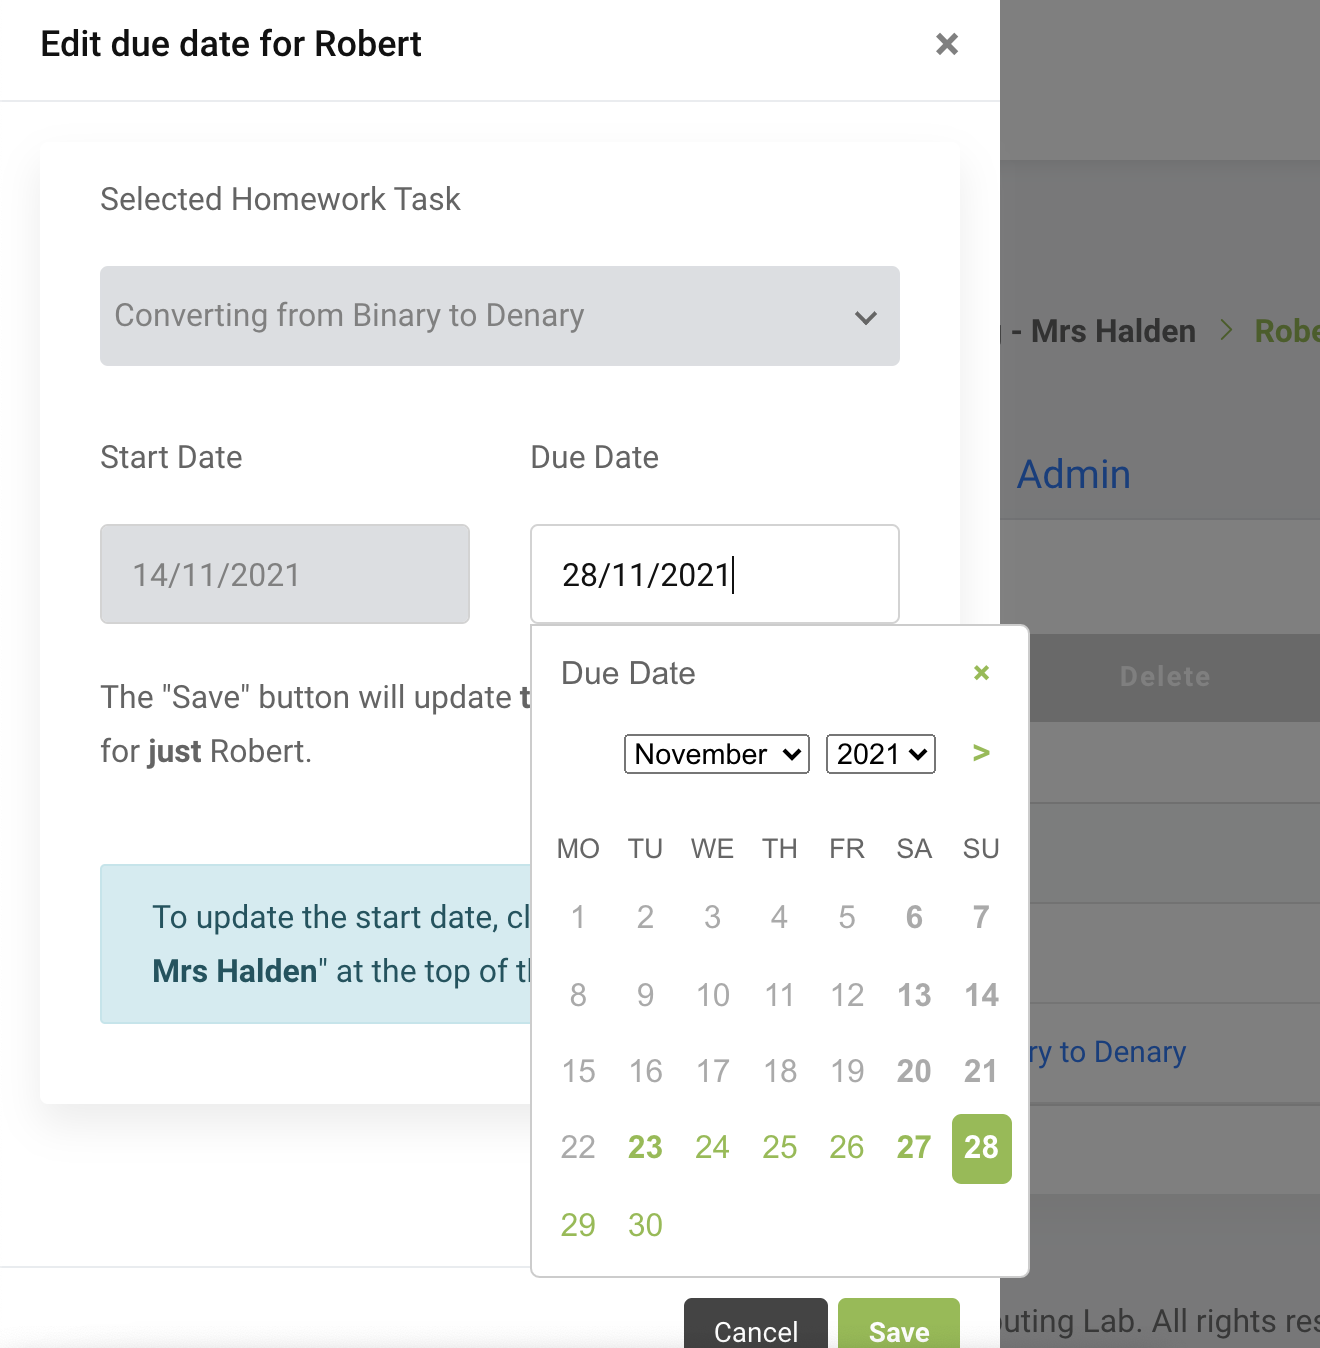
Click the "Save" button to apply the changes.
PLEASE NOTE: This student now has a different due date from all other students on this task. To put all students back onto the same due date, follow this article.

